
Nodebeats
Nodebeats is an Open source Content Management System built using MEAN framework developed by Bitsbeat IT Solution.
Nodebeats makes it easy to create web sites and applications and comes with beautiful admin UI.
Check out the Nodebeats Getting Started Guide to start using Nodebeats.
About
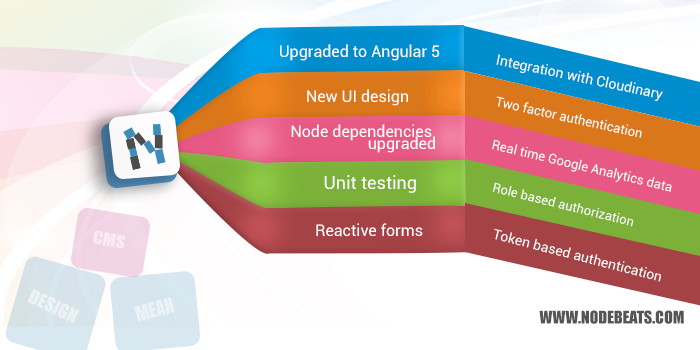
Nodebeats provides following features:
- Two factor authentication
- Token based authentication
- Role based authorization
- Authorization Token Management
- Real time Google Analytics data
- Host of options for email service providers like Mailgun, Postmark, Sendgrid, Mandrill, Google SMTP etc.
- Integration with Cloudinary for Image management
- Commenting system using Disqus
- Responsive html template integration
- And many more features that you will love to have around.
Usage
For detailed usage documentation, Check out the Nodebeats Getting Started Guide to start using Nodebeats
For api documentation, Check out the API Documentation
Installation
-
Install Node.js if not already installed
- Recommended Node version: >= v6.10, but latest version is always better
-
Install express, gulp, angular-cli and globally in your local development machine (not mandatory but recommended)
- npm install express gulp angular-cli -g
-
Clone the project repository
-
Go to the cloned project's root directory and install all the dependencies required for Node.js
- cd nodebeats - to direct into the cloned project's root directory
- npm install or yarn if installed - for installing the dependencies
-
After the root directory dependencies installation, go to admin directory from the root directory and install all the dependencies required for Angular
- cd admin - to direct into the admin directory
- npm install or yarn if installed - for installing the dependencies
Running Application in Development Environment
- After the successful installation of all the required dependencies, run 'npm start' in the root and run 'npm run start:client' or 'npm run start:admin' for respective app to run in admin directory where the dependencies were installed.
Running Application in Production Environment
-
To run the application in production environment, first the angular application should be built into static files so that those files could be served from the server.
-
To generate dist files needed to run the application in production environment
-
To generate deployment package of the admin app for production type, run the following commands:
- cd admin
- npm run build:all or npm run build:client(for building client application only)
-
After the successful build, run the application using the command below:
- npm run serve
-
Note
-
Browse http://localhost:4200 for client app and browse http://localhost:4500 for dashboard app if you are in development environment and Browse http://localhost:4005 if you are in production environment.
-
To login while in the development environment, navigate to http://localhost:4500 and if you are in production environment, to login, navigate to http://localhost:4005/login and use following application default credentials to access dashboard menu.
    username: superadmin

    password: testpassword123
Test
We have written integration tests for much of the functionality in this application. We haven't completed writing unit tests, but we are planning to write unit tests for much of the functionality in the next release phase. Your contribution in writing unit tests for this application will be hugely appreciated and welcomed.
So, to run test, first we will have to modify couple of things to make test successfull. So, let's get started:
- First of all, we need to change the database configuration file. Navigate to lib/configs directory from your project root directory. Edit database.config.js file and in the test section, place the appropriate MongoDB credentials:
    test: {
        username: '',
        password: '',
        host: '',
        port: '',
        dbName: ''
    }
-
If you have enabled authentication for MongoDB server instance on your machine, then at first, you need to create a database and an authenticated user on the newly created database. You must do this step if you have enabled authentication in your MongoDB configuration file.
dbUrl = "mongodb://" + databaseConfig.test.username + ":" + databaseConfig.test.password + "@" + databaseConfig.test.host + ":" + databaseConfig.test.port + "/" + databaseConfig.test.dbName;If you haven't enabled authentication in MongoDB server, then you need to remove the username and password from the connection url.You also need to modify the database connection url in index.js inside of test/ directory.
dbUrl = "mongodb://" + databaseConfig.test.host + ":" + databaseConfig.test.port + "/" + databaseConfig.test.dbName; -
Now, that we have modified database configuration file, now we need to change some inputs in the test index file. So, navigate to test folder from the root of your project and then modify the index.js file.
-
You need to change the contents of imagePathUrl and documentPathUrl variable with the appropriate data. You must change these values, otherwise test will fail.
-
Once you have changed the variable contents of index.js file inside of test/ folder, you also need to modify cloudinary.setting.integration.test.js file inside of test/integrationtests/ and replace the existing coudinary config with the valid data.
cloudinarySettingConfig = { cloudinaryCloudName: "nodebeatstest", cloudinaryApiKey: "455468798113233", cloudinaryApiSecret: "mrYsTL9i0fRiosjLhKbIlRA2nw0" }; -
The last thing you need to do is modify email.service.configure.integration.test.js file inside of test/integrationtests/ and replace the existing mail service configuration data with valid data.
     emailServiceConfigInfo = {
        serviceProviderType: "mailgun",
        api_Key: "key-ff32b449ddad2dsds5rd9b5dd1ff33005c79b",
        api_Secret: "api-Keyjlki98dssew34r2jklfnlrwhoiukhdsj",
        domain: "sandbox73ad601fcdd74461bdsdsr1c46820a59b2374.mailgun.org.np"
    };
Well, that's it. Now you can run test. To run the test,
-
Open two terminal windows
-
First step is to run npm run test command in one terminal window. This command will start the server and listen for client requests in test environment mode.
-
Then, run gulp test in another terminal window to run our test files.
To run the test in admin app,
-
Go to admin directory from your project root directory
cd admin
-
Open two terminal windows
-
First step is to run npm run test command
-
For end to end testing run npm run e2e command
Community
"Knowledge is power, Community is strength and positive attitude is everything" by Lance Armstrong.
"Alone We can do so little, Together we can do so much" by Hellen Keller.
The above quotes shows us that how much the community is important to us. We also want to create a community that is friendly, engaging and most of all where everybody helps each other.
So to get involved, following are the ways that will connect us:
- Chat with us at gitter.im
- Follow @Nodebeats for news and announcements
- Regarding existing product features and new features, do give us your feedbacks and suggestions at ProductPains
- Ask any technical question regarding Nodebeats at Stackoverflow and tag them nodebeats
- Report the issues at our github repo's issue tracker page
- We have a Mailing List. Feel free to join and ask questions.
So do send us your feedbacks and suggestions. You can also email us at [email protected]
Maintainers
Contributors
Contributing
We aim to make this software upto date, secured and at the same time provide more features. So, We need your help to make this possible. You can contribute to this project by reporting issues, discussing ideas and submitting pull requests with patches and new features.
If you can make some donations, then that will be great.

Sponsors
No sponsors yet! Will you be the first?
Deploying Nodebeats
You can host your website built using Nodebeats in any of the available hosting providers. Some of the most popular cloud computing platforms are Redhat Openshift, DigitalOcean and Modulus.io
Staying Up to Date
We will be adding new features regularly, improve the codebase continually and also keep the project's npm dependencies upto date so that there will not be any security vulnerabilities due to the npm packages. In this release version, we have integrated docker configuration with nodebeats so that then installation process of nodebeats is quick and easy and uniform across multiple platforms. We will release the next version as soon as the planned features are completed. In the next version, we plan to implement install setup wizard and deploy docker image in docker hub. We aim to make this software as secured as possible and announce the new version releases on our twitter account. So, to get the information about the latest releases, follow us on Twitter @Nodebeats. You can also contact us at [email protected] regarding anything about the software.
Project Maturity
Nodebeats is more than 2 years old from the start of project inception date. You can use nodebeats cms to create and deploy web applications in the production server.
Inspiration
As We all know Wordpress, one of the most popular Content Management System currently in use and Ghost, a blogging platform that is probably the best in the technology world related to creating blogs, Mainly these two projects inspire us to start this product. People around the world use wordpress to create hundred of thousands of websites everyday. When someone talks about Content Management System for PHP programming language, then most of the time we hear about Wordpress. We also want to make this product like wordpress which people will use to create their websites in the future. Right now, it may seem very hard to acheive the goal but it is not impossible. We will continue to improve this product continually.
Note
With this new release version, we have introduced the latest version of all the dependencies like Angular 5 to name one so that the application will be up-to-date along with the technology.
In the next release, We plan to introduce server side rendering for improving the accessibility of the application.
License
Copyright (c) 2017 Nodebeats
Licensed under the Apache License, Version 2.0 (the "License"); you may not use this file except in compliance with the License. You may obtain a copy of the License at
http://www.apache.org/licenses/LICENSE-2.0
Unless required by applicable law or agreed to in writing, software distributed under the License is distributed on an "AS IS" BASIS, WITHOUT WARRANTIES OR CONDITIONS OF ANY KIND, either express or implied. See the License for the specific language governing permissions and limitations under the License.
A copy of the license is available in the repository's license.txt file.