
VSCode OCaml Platform

Visual Studio Code extension for OCaml and relevant tools.
❗️ You are encouraged to read the Getting started section. The rest of the document assumes you have read it. You may also find Important concepts useful.
If you have issues with the extension and you have read the "Getting Started" section, see Debugging the extension and FAQ below.
Getting started
Installation
Below we first install the extension dependencies and then the extension itself. You can reverse the order; it's just that the extension will not work to its full without all of its dependencies.
-
Installing extension dependencies
This VS Code for most of its OCaml language support functionality requires OCaml Language Server (often called
ocaml-lsporocamllsp). Install ocaml-lsp-server package as usual with a package manager of your choice: OPAM or esy. Installation instructions by package manager are available here.Make sure to install the packages in the sandbox (usually, OPAM switch or esy sandbox) you use for compiling your project.
Optionally:
-
Install ocamlformat package if you want source file formatting support.
Note: Formatting support requires having
.ocamlformatfile in your project root directory. -
When you hover the cursor over OCaml code, the extension shows you the type of the code. Install ocamlformat to get nicely formatted types.
-
-
Install this extension from the VSCode Marketplace. VSCode extension installations instructions are available here.
If you're on Mac or Linux, now you should have everything necessary installed and ready. You can skip the sub-section below named "Windows" and proceed to "Setting up the extension for your project."
On Windows
Install OCaml for Windows and
make sure the ocaml-env program is accessible on the PATH (ocaml-env is in
the usr/local/bin folder relative to the installation directory).
Setting up the extension for your project
-
Open your OCaml/ReasonML project (
File > Add Folder to Workspace...). -
Configure the extension to use the desired sandbox (usually, OPAM switch or esy sandbox). You can pick it by
-
either calling VSCode command "OCaml: Select a Sandbox for this Workspace" (one can do this from VSCode Command Palette - Ctrl+P or on MacOS Cmd+Shift+P)
-
or clicking on the package icon at the bottom of VSCode window and picking your sandbox from the menu

What's a sandbox? In short, the main purpose of a sandbox is to specify how this extension should invoke its dependencies such as
ocaml-lsp-serverorocamlformat. For more information on what a sandbox is, see "Sandbox" subsection. -
-
Build your project with Dune to get go-to-definition, auto-completion, etc.
Important note: OCaml Language Server has its information about the files from the last time your built your project.
Caveat 1: Because of the note above, during active development of your project, we advise building your project with dune in a polling mode using the option
--watch. This rebuilds your project whenever a file is changed in your project. For example, rundune build --watch --terminal-persistence=clear-on-rebuildin your VSCode integrated terminal.Caveat 2: Save the currently open file to get latest diagnostics (error and warning squiggly underlining). For example, if you created a module
Ain some file, and you still get an error that it's "unbound" (i.e., not found) in the current file, save the file to get up-to-date diagnostics, assuming you built your project after addingAor are running build in a polling mode, and make sure that error isn't a stale error.
By this point, you should have a working OCaml development editor ready. If you're on Windows or use ReasonML/ReScript/BuckleScript, see subsections below.
ReasonML / ReScript / BuckleScript
ReasonML, as an alternative syntax for OCaml, is supported out-of-the-box, as
long as reason is installed in your environment.
The new ReScript syntax (res and resi files) is not supported, you should
use rescript-vscode instead.
If you're looking for a way to use OCaml or ReasonML syntax in a ReScript project, it is no longer supported by this extension.
If you need to compile existing OCaml or ReasonML syntax to JS and use this extension, you can use Melange:
- Install esy
npm install esy --global- You can use the Melange basic template to add OCaml LSP support. Then modify esy.json to pin ocaml-lsp-server to version 1.8.3 due to lack of Merlin support in newer versions.
{
  "dependencies": {
    "@opam/ocaml-lsp-server": "1.8.3"
  }
}- Install and build packages
esyImportant Concepts
Sandbox
Sandbox defines environment that the extension sees, for example, to launch
ocamllsp, detect OCaml compiler version, or use ocamlformat.
The extension supports 4 kinds of sandboxes:
- Global
The extension uses the environment that VS Code was opened in.
- OPAM Sandbox
The extension uses the environment defined by the OPAM switch that the user picks. Both global and local OPAM switches are supported.
- Esy Sandbox
The extension uses the environment defined by the Esy sandbox that the user picks.
- Custom
User can define how they would like to run commands using a (templated) command
where $prog and $args strings need to be used to denote how to run an
extension dependency and how arguments can be passed. One can imitate an OPAM
sandbox using a custom sandbox by passing a command
opam exec --switch=4.13.1 --set-switch -- $prog $args -- the extension can
then replace $prog with ocamllsp and $args with arguments it wants to pass
to ocamllsp.
Features
- Syntax highlighting
- ATD
- Cram tests
- Dune
- Menhir
- Merlin
- META
- OASIS
- OCaml
- OCamlbuild
- OCamlFormat
- OCamllex
- opam
- ReasonML
- Eliom
- Indentation rules
- Snippets
- Dune
- OCaml
- OCamllex
- Task Provider
- Dune
- Debugger
- Earlybird (experimental)
Configuration
This extension provides options in VSCode's configuration settings. You can find
the settings under File > Preferences > Settings.
| Name | Description | Default |
|---|---|---|
ocaml.sandbox |
Determines where to find the sandbox for a given project | null |
ocaml.dune.autoDetect |
Controls whether dune tasks should be automatically detected. | true |
ocaml.trace.server |
Controls the logging output of the language server. Valid settings are off, messages, or verbose. |
off |
ocaml.useOcamlEnv |
Controls whether to use ocaml-env (if available) for opam commands from OCaml for Windows. | true |
ocaml.terminal.shell.linux |
The path of the shell that the sandbox terminal uses on Linux | null |
ocaml.terminal.shell.osx |
The path of the shell that the sandbox terminal uses on macOS | null |
ocaml.terminal.shell.windows |
The path of the shell that the sandbox terminal uses on Windows | null |
ocaml.terminal.shellArgs.linux |
The command line arguments that the sandbox terminal uses on Linux | null |
ocaml.terminal.shellArgs.osx |
The command line arguments that the sandbox terminal uses on macOS | null |
ocaml.terminal.shellArgs.windows |
The command line arguments that the sandbox terminal uses on Window | null |
ocaml.repl.path |
The path of the REPL that the extension uses | null |
ocaml.repl.args |
The REPL arguments that the extension uses | null |
ocaml.repl.useUtop |
Controls whether to use Utop for the REPL if it is installed in the current switch. | true |
If ocaml.terminal.shell.* or ocaml.terminal.shellArgs.* is null, the
configured VSCode shell and shell arguments will be used instead.
If ocaml.repl.path or ocaml.repl.args is null, the default REPL is used
instead. The default REPL used depends on the packages installed in your current
sandbox:
- If
dune buildpasses and the current sandbox hasutopinstalled, the REPL will bedune utop - If
dune buildfails and the current sandbox hasutopinstalled, the REPL will beutop - Else, the REPL will be
ocaml
If a REPL already exists, it will be used instead, so if you installed utop
after openning a REPL, or if you fixed your project compilation, you will need
to re-open the REPL to change it.
Commands
An easy way to see what commands are offered by the extension in the currently
open file, you can invoke VSCode Command Palette and search for commands with
prefix OCaml::

| Name | Description | Keyboard Shortcuts |
|---|---|---|
ocaml.select-sandbox |
Select sandbox for this workspace | |
ocaml.server.restart |
Restart language server | |
ocaml.open-terminal |
Open a terminal (current sandbox) | |
ocaml.open-terminal-select |
Open a terminal (select a sandbox) | |
ocaml.current-dune-file |
Open Dune File (located in the same folder) | |
ocaml.switch-impl-intf |
Switch implementation/interface | Alt+O |
ocaml.open-repl |
Open REPL | |
ocaml.evaluate-selection |
Evaluate Selection | Shift+Enter |
Debugging OCaml programs (experimental)
Experimental support for debugging OCaml programs is provided via earlybird. Problems with the debugger should be reported at https://github.com/hackwaly/ocamlearlybird.
Two steps to set up debugging:
-
Install earlybird, which provides the
ocamlearlybirdexecutable.For newer OCaml version support, opam pin the development version from https://github.com/hackwaly/ocamlearlybird.
-
If you use
dunelanguage version 3.0+ to build your project, switch to 3.7+ and make sure that you add:(map_workspace_root false)to your
dune-projectfile. More info on this here. -
Build bytecode version of your OCaml program executable.
See dune documentation for further information.
There are three ways to launch the debugger in VS Code:
-
Navigate to the built OCaml bytecode executable in VS Code Explorer panel (a
.bcfile in_builddirectory), right click on it and select "Start OCaml Debugging (experimental)".The debugger launches immediately.
-
If no VS Code launch configurations (the
.vscode/launch.jsonfile) exist, then navigate to VS Code Run and Debug panel, click on "create a launch.json file" and select "OCaml earlybird (experimental)".Run the created "OCaml earlybird (experimental)" launch configuration to launch the debugger. By default, it asks to open an OCaml bytecode executable (a
.bcfile in_builddirectory) to debug. You can hard-code a specific program instead of the default${command:AskProgram}. -
If some VS Code launch configurations exist (in
.vscode/launch.json), then open thelaunch.jsonfile and insideconfigurationspress Ctrl+Space to select the "OCaml earlybird (experimental)" snippet. Then fill in the OCaml bytecode executable path and desired launch configuration name.Run the created launch configuration to launch the debugger.
Debugging the extension
Problems with code or file formatting support
If you are experiencing problems with OCaml code support, e.g., you invoke
Go to Definition on a symbol (for example, a variable name), but nothing
happens, or you hover the cursor over a symbol and don't see its type, the
problem is likely to be with OCaml-LSP, which is responsible for code support.
Two steps to see if there are reported problems with OCaml-LSP (which you can either act upon yourself if you can or report the problem in Issues/Discussion of this repository):
- Set the
ocaml.trace.serversetting toverbosein VS Code settings.

-
Invoke command
OCaml: Show OCaml Language Server Outputfrom the VS Code Command Palette. This command shows requests and responses exchanged between this extension and OCaml-LSP. If, for example,Go to Definitionis not working when you think it should, you may see some exception logged in this Output View:[Error - 10:41:51 PM] Locate failed. File_not_found: 'Fiber' seems to originate from 'Fiber' whose ML file could not be foundYou can also sometimes see explicitly an exception being thrown. Such kind of information in an issue report is usually very helpful in detecting and fixing the problem.
If you face such kind of problems that you cannot resolve on your own, please, check that the issue hasn't been reported yet and report in Issues if necessary.
Note: File formatting is performed on the OCaml-LSP side, so OCaml-LSP may be the culprit in a formatting problem. Make sure, however, that you've read Getting Started section, which describes some initial setup required for file formatting to work.
Problems with this Extension or OPAM support in the Extension
One by one, invoke and see outputs for commands
OCaml: Show OCaml Platform Extension Output and
OCaml: Show OCaml Commands Output. In these Output Views you may see errors
and warnings, which can be handy to detect and fix the problem you're facing.
Please, check the issue you're facing hasn't been already reported and report in
Issues tab of this
repository, if necessary.
Things to include in your Issue report
It is helpful to include information such as
- Operation system information
- VS Code version
- OCaml Platform Extension version
- OCaml-LSP version
- Reproducible setup (some codebase, for example, where we can see the bug happening) the problem
- Output View information described above
FAQ
I installed ocaml-lsp-server, but the extension still cannot find it.
Make sure you installed the the language server in the sandbox used by the extension.
OPAM: If you're using opam, make sure that you're using correct switch when
installing the extension by running opam switch to see the current switch and
check the sandbox set for the current VSCode workspace (see "Setting up the
extension for your project" section to learn more about picking a sandbox for
the extension).
I am getting Unbound module ... error. What should I do?
-
Make sure the module should be visible, e.g., there is no typo in the module name, you added the module to
librariesstanza in yourdunefile, etc. -
Make sure you have up-to-date diagnostics (error and warning squiggly underlining). Diagnostics are sent when the file open, when file is edited, and when it is saved. Save the file containing the error to make sure the error isn't stale.
-
Make sure you have built your project after adding that module to your environment. We suggest adhering to Caveat 1 in "Setting up the extension for your project" section. If you haven't built it, build it and go to step 2.
-
If you are sure there must be a problem with the extension, file an issue.
In case you have a question or problem not listed above:
-
if you don't understand how to the extension works or how to make it work correctly, create a new discussion in the repository Discussions tab.
-
if the extension seems to misbehave:
If this section doesn't contain the problem you managed to resolve, and you think this may help others, consider adding the problem and its solution here by creating a Pull Request.
For advanced users
This part of README is only for advanced users, who would like more customization.
Disable code lens
Code lens are type information displayed over a symbol. In the screenshot below,
code lens is grey text t -> Sandbox.t.

You can disable code lens for all extensions, i.e., in whole VS Code, set this
settings in your settings.json:
"editor.codeLens": falseOr if you only want to disable it for OCaml:
"[ocaml]": {
"editor.codeLens": false
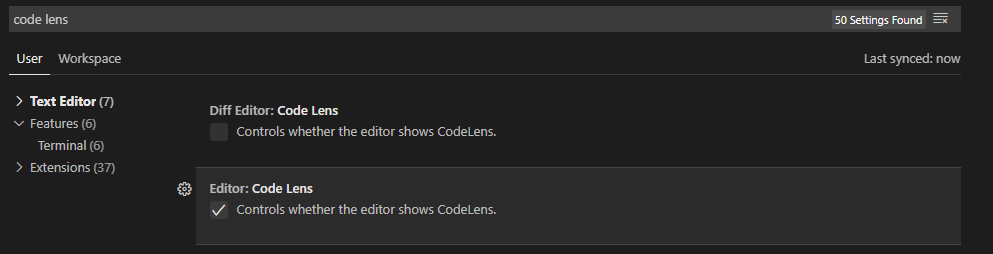
}You can also search for "code lens" in the VSCode settings tab and there will be a checkbox you can untick to disable it:
(Credit for this answer goes to @mnxn)
Enable only syntax highlighting (No type-on-hover, go-to-definition, etc.)
The extension does not offer such functionality because it is rarely necessary.
A workaround is to not install ocamllsp. As a result you will mostly have
just syntax highlighting for OCaml source files but also a warning notification
that ocamllsp wasn't found. See this
issue, feel
free to upvote this issue by leaving a thumbs-up reaction. Pull requests are
welcome as well.
Persisting sandbox information
Sandbox information is persisted in .vscode/settings.json. Below we show how
this settings file's content may look like with different sandbox options.
- Global
{
  "ocaml.sandbox": {
    "kind": "global"
  }
}- OPAM
Global switch
{
  "ocaml.sandbox": {
    "kind": "opam",
    "switch": "ocaml-base-compiler.4.13.1"
  }
}
Local switch
{
  "ocaml.sandbox": {
    "kind": "opam",
    "switch": "/Users/ulugbekna/code/olsp"
  }
}- Esy
{
  "ocaml.sandbox": {
    "kind": "esy",
    "root": "${workspaceFolder:vscode-ocaml-platform}"
  }
}- Custom
{
  "ocaml.sandbox": {
    "kind": "custom",
    "template": "opam exec -- $prog $args"
  }
}