Overview
Note: This is a tracking library, not a stand-alone avatar puppeteering program. I'm also working on VSeeFace, which allows animating VRM and VSFAvatar 3D models by using OpenSeeFace tracking. VTube Studio uses OpenSeeFace for webcam based tracking to animate Live2D models. A renderer for the Godot engine can be found here.
This project implements a facial landmark detection model based on MobileNetV3.
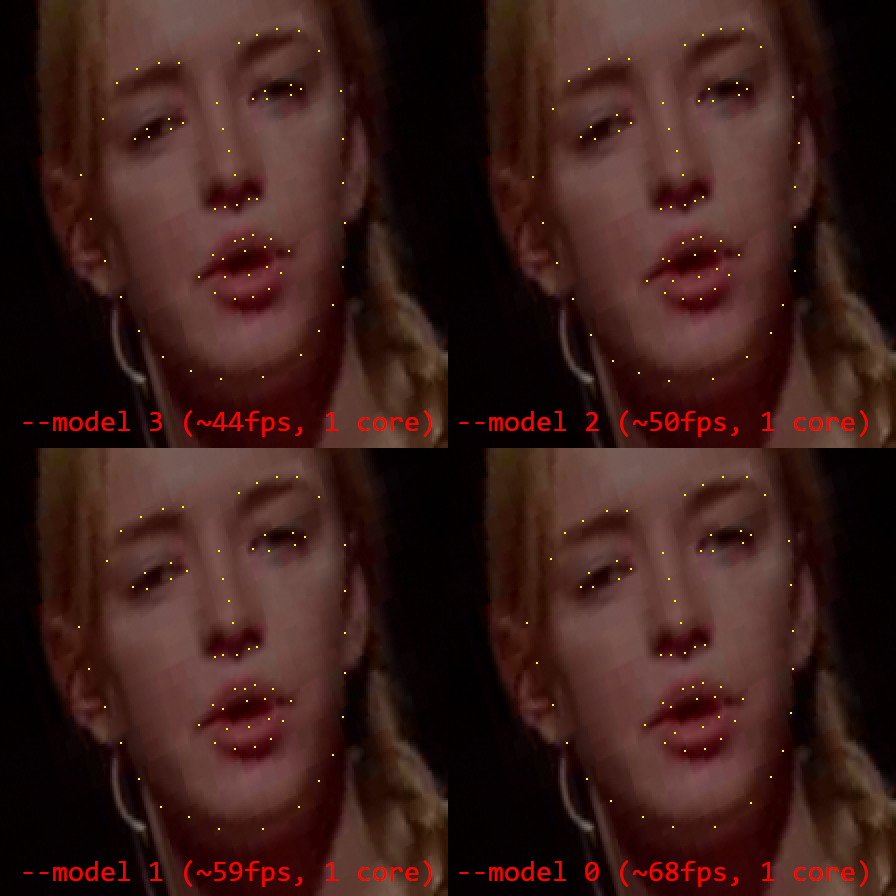
As Pytorch 1.3 CPU inference speed on Windows is very low, the model was converted to ONNX format. Using onnxruntime it can run at 30 - 60 fps tracking a single face. There are four models, with different speed to tracking quality trade-offs.
If anyone is curious, the name is a silly pun on the open seas and seeing faces. There's no deeper meaning.
An up to date sample video can be found here, showing the default tracking model's performance under different noise and light levels.
Tracking quality
Since the landmarks used by OpenSeeFace are a bit different from those used by other approaches (they are close to iBUG 68, with two less points in the mouth corners and quasi-3D face contours instead of face contours that follow the visible outline) it is hard to numerically compare its accuracy to that of other approaches found commonly in scientific literature. The tracking performance is also more optimized for making landmarks that are useful for animating an avatar than for exactly fitting the face image. For example, as long as the eye landmarks show whether the eyes are opened or closed, even if their location is somewhat off, they can still be useful for this purpose.
From general observation, OpenSeeFace performs well in adverse conditions (low light, high noise, low resolution) and keeps tracking faces through a very wide range of head poses with relatively high stability of landmark positions. Compared to MediaPipe, OpenSeeFace landmarks remain more stable in challenging conditions and it accurately represents a wider range of mouth poses. However, tracking of the eye region can be less accurate.
I ran OpenSeeFace on a sample clip from the video presentation for 3D Face Reconstruction with Dense Landmarks by Wood et al. to compare it to MediaPipe and their approach. You can watch the result here.
Usage
A sample Unity project for VRM based avatar animation can be found here.
The face tracking itself is done by the facetracker.py Python 3.7 script. It is a commandline program, so you should start it manually from cmd or write a batch file to start it. If you downloaded a release and are on Windows, you can run the facetracker.exe inside the Binary folder without having Python installed. You can also use the run.bat inside the Binary folder for a basic demonstration of the tracker.
The script will perform the tracking on webcam input or video file and send the tracking data over UDP. This design also allows tracking to be done on a separate PC from the one who uses the tracking information. This can be useful to enhance performance and to avoid accidentially revealing camera footage.
The provided OpenSee Unity component can receive these UDP packets and provides the received information through a public field called trackingData. The OpenSeeShowPoints component can visualize the landmark points of a detected face. It also serves as an example. Please look at it to see how to properly make use of the OpenSee component. Further examples are included in the Examples folder. The UDP packets are received in a separate thread, so any components using the trackingData field of the OpenSee component should first copy the field and access this copy, because otherwise the information may get overwritten during processing. This design also means that the field will keep updating, even if the OpenSee component is disabled.
Run the python script with --help to learn about the possible options you can set.
python facetracker.py --help
A simple demonstration can be achieved by creating a new scene in Unity, adding an empty game object and both the OpenSee and OpenSeeShowPoints components to it. While the scene is playing, run the face tracker on a video file:
python facetracker.py --visualize 3 --pnp-points 1 --max-threads 4 -c video.mp4
Note: If dependencies were installed using poetry, the commands have to be executed from a poetry shell or have to be prefixed with poetry run.
This way the tracking script will output its own tracking visualization while also demonstrating the transmission of tracking data to Unity.
The included OpenSeeLauncher component allows starting the face tracker program from Unity. It is designed to work with the pyinstaller created executable distributed in the binary release bundles. It provides three public API functions:
public string[] ListCameras()returns the names of available cameras. The index of the camera in the array corresponds to its ID for thecameraIndexfield. Setting thecameraIndexto-1will disable webcam capturing.public bool StartTracker()will start the tracker. If it is already running, it will shut down the running instance and start a new one with the current settings.public void StopTracker()will stop the tracker. The tracker is stopped automatically when the application is terminated or theOpenSeeLauncherobject is destroyed.
The OpenSeeLauncher component uses WinAPI job objects to ensure that the tracker child process is terminated if the application crashes or closes without terminating the tracker process first.
Additional custom commandline arguments should be added one by one into elements of commandlineArguments array. For example -v 1 should be added as two elements, one element containing -v and one containing 1, not a single one containing both parts.
The included OpenSeeIKTarget component can be used in conjunction with FinalIK or other IK solutions to animate head motion.
Expression detection
The OpenSeeExpression component can be added to the same component as the OpenSeeFace component to detect specific facial expressions. It has to be calibrated on a per-user basis. It can be controlled either through the checkboxes in the Unity Editor or through the equivalent public methods that can be found in its source code.
To calibrate this system, you have to gather example data for each expression. If the capture process is going too fast, you can use the recordingSkip option to slow it down.
The general process is as follows:
- Type in a name for the expression you want to calibrate.
- Make the expression and hold it, then tick the recording box.
- Keep holding the expression and move your head around and turn it in various directions.
- After a short while, start talking while doing so if the expression should be compatible with talking.
- After doing this for a while, untick the recording box and work on capturing another expression.
- Tick the train box and see if the expressions you gathered data for are detected accurately.
- You should also get some statistics in the lower part of the component.
- If there are issues with any expression being detected, keep adding data to it.
To delete the captured data for an expression, type in its name and tick the "Clear" box.
To save both the trained model and the captured training data, type in a filename including its full path in the "Filename" field and tick the "Save" box. To load it, enter the filename and tick the "Load" box.
Hints
- A reasonable number of expressions is six, including the neutral one.
- Before starting to capture expressions, make some faces and wiggle your eyebrows around, to warm up the feature detection part of the tracker.
- Once you have a detection model that works decently, when using it take a moment to check all the expressions work as intended and add a little data if not.
General notes
- The tracking seems to be quite robust even with partial occlusion of the face, glasses or bad lighting conditions.
- The highest quality model is selected with
--model 3, the fastest model with the lowest tracking quality is--model 0. - Lower tracking quality mainly means more rigid tracking, making it harder to detect blinking and eyebrow motion.
- Depending on the frame rate, face tracking can easily use up a whole CPU core. At 30fps for a single face, it should still use less than 100% of one core on a decent CPU. If tracking uses too much CPU, try lowering the frame rate. A frame rate of 20 is probably fine and anything above 30 should rarely be necessary.
- When setting the number of faces to track to a higher number than the number of faces actually in view, the face detection model will run every
--scan-everyframes. This can slow things down, so try to set--facesno higher than the actual number of faces you are tracking.
Models
Four pretrained face landmark models are included. Using the --model switch, it is possible to select them for tracking. The given fps values are for running the model on a single face video on a single CPU core. Lowering the frame rate would reduce CPU usage by a corresponding degree.
- Model -1: This model is for running on toasters, so it's a very very fast and very low accuracy model. (213fps without gaze tracking)
- Model 0: This is a very fast, low accuracy model. (68fps)
- Model 1: This is a slightly slower model with better accuracy. (59fps)
- Model 2: This is a slower model with good accuracy. (50fps)
- Model 3 (default): This is the slowest and highest accuracy model. (44fps)
FPS measurements are from running on one core of my CPU.
Pytorch weights for use with model.py can be found here. Some unoptimized ONNX models can be found here.
Results
Landmarks
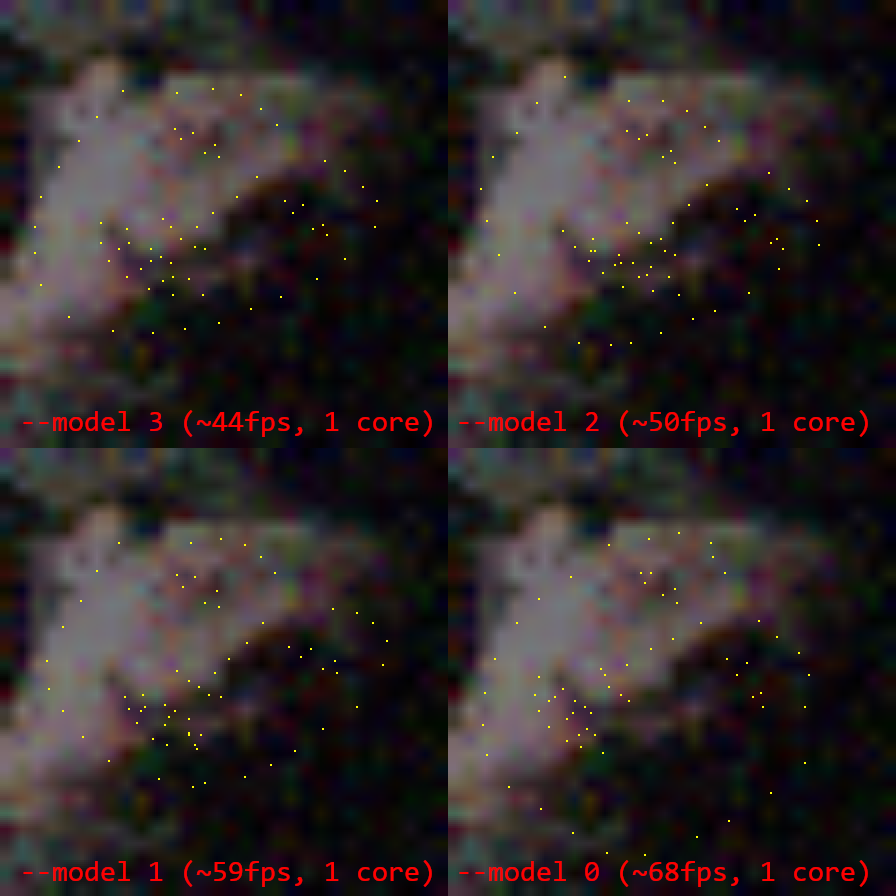
More samples: Results3.png, Results4.png
Face detection
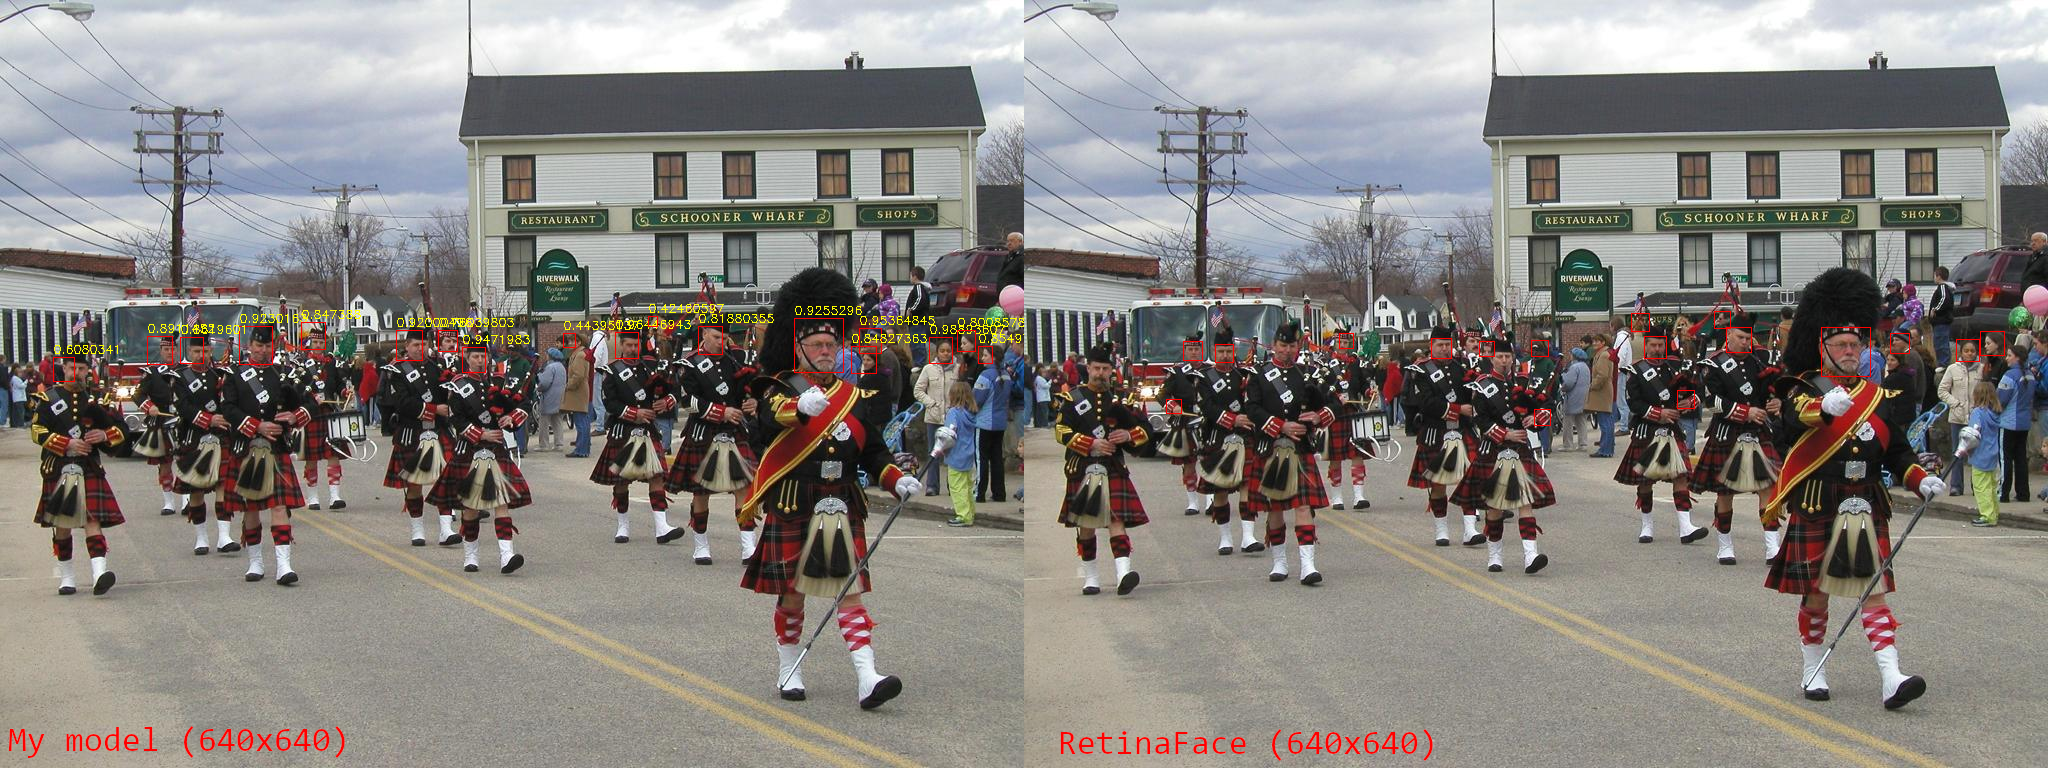
The landmark model is quite robust with respect to the size and orientation of the faces, so the custom face detection model gets away with rougher bounding boxes than other approaches. It has a favorable speed to accuracy ratio for the purposes of this project.
Release builds
The builds in the release section of this repository contain a facetracker.exe inside a Binary folder that was built using pyinstaller and contains all required dependencies.
To run it, at least the models folder has to be placed in the same folder as facetracker.exe. Placing it in a common parent folder should work too.
When distributing it, you should also distribute the Licenses folder along with it to make sure you conform to requirements set forth by some of the third party libraries. Unused models can be removed from redistributed packages without issue.
The release builds contain a custom build of ONNX Runtime without telemetry.
Dependencies (Python 3.6 - 3.9)
- ONNX Runtime
- OpenCV
- Pillow
- Numpy
The required libraries can be installed using pip:
pip install onnxruntime opencv-python pillow numpy
Alternatively poetry can be used to install all dependencies for this project in a separate virtual env:
poetry install
Dependencies (Python 3.10 and above)
- ort-nightly
- OpenCV
- Pillow
- Numpy
The required libraries can be installed using pip:
pip install ort-nightly opencv-python pillow numpy
References
Training dataset
The model was trained on a 66 point version of the LS3D-W dataset.
@inproceedings{bulat2017far,
  title={How far are we from solving the 2D \& 3D Face Alignment problem? (and a dataset of 230,000 3D facial landmarks)},
  author={Bulat, Adrian and Tzimiropoulos, Georgios},
  booktitle={International Conference on Computer Vision},
  year={2017}
}
Additional training has been done on the WFLW dataset after reducing it to 66 points and replacing the contour points and tip of the nose with points predicted by the model trained up to this point. This additional training is done to improve fitting to eyes and eyebrows.
@inproceedings{wayne2018lab,
  author = {Wu, Wayne and Qian, Chen and Yang, Shuo and Wang, Quan and Cai, Yici and Zhou, Qiang},
  title = {Look at Boundary: A Boundary-Aware Face Alignment Algorithm},
  booktitle = {CVPR},
  month = June,
  year = {2018}
}
For the training the gaze and blink detection model, the MPIIGaze dataset was used. Additionally, around 125000 synthetic eyes generated with UnityEyes were used during training.
It should be noted that additional custom data was also used during the training process and that the reference landmarks from the original datasets have been modified in certain ways to address various issues. It is likely not possible to reproduce these models with just the original LS3D-W and WFLW datasets, however the additional data is not redistributable.
The heatmap regression based face detection model was trained on random 224x224 crops from the WIDER FACE dataset.
@inproceedings{yang2016wider,
  Author = {Yang, Shuo and Luo, Ping and Loy, Chen Change and Tang, Xiaoou},
  Booktitle = {IEEE Conference on Computer Vision and Pattern Recognition (CVPR)},
  Title = {WIDER FACE: A Face Detection Benchmark},
  Year = {2016}
}
Algorithm
The algorithm is inspired by:
- Designing Neural Network Architectures for Different Applications: From Facial Landmark Tracking to Lane Departure Warning System by YiTa Wu, Vice President of Engineering, ULSee
- Real-time Human Pose Estimation in the Browser with TensorFlow.js
- U-Net: Convolutional Networks for Biomedical Image Segmentation by Olaf Ronneberger, Philipp Fischer, Thomas Brox
- MobileNets: Efficient Convolutional Neural Networks for Mobile Vision Applications by Andrew G. Howard, Menglong Zhu, Bo Chen, Dmitry Kalenichenko, Weijun Wang, Tobias Weyand, Marco Andreetto, Hartwig Adam
- Searching for MobileNetV3 by Andrew Howard, Mark Sandler, Grace Chu, Liang-Chieh Chen, Bo Chen, Mingxing Tan, Weijun Wang, Yukun Zhu, Ruoming Pang, Vijay Vasudevan, Quoc V. Le, Hartwig Adam
The MobileNetV3 code was taken from here.
For all training a modified version of Adaptive Wing Loss was used.
- Adaptive Wing Loss for Robust Face Alignment via Heatmap Regression by Xinyao Wang, Liefeng Bo, Li Fuxin
For expression detection, LIBSVM is used.
Face detection is done using a custom heatmap regression based face detection model or RetinaFace.
@inproceedings{deng2019retinaface,
  title={RetinaFace: Single-stage Dense Face Localisation in the Wild},
  author={Deng, Jiankang and Guo, Jia and Yuxiang, Zhou and Jinke Yu and Irene Kotsia and Zafeiriou, Stefanos},
  booktitle={arxiv},
  year={2019}
}
RetinaFace detection is based on this implementation. The pretrained model was modified to remove unnecessary landmark detection and converted to ONNX format for a resolution of 640x640.
Thanks!
Many thanks to everyone who helped me test things!
- @Virtual_Deat, who also inspired me to start working on this.
- @ENiwatori and family.
- @ArgamaWitch
- @AngelVayuu
- @DapperlyYours
- @comdost_art
- @Ponoki_Chan
License
The code and models are distributed under the BSD 2-clause license.
You can find licenses of third party libraries used for binary builds in the Licenses folder.


