DEPRECATED - Import plugin for Craft CMS
Plugin that allows you to import data from CSV files.
Deprecated
With the release of Craft 3 on 4-4-2018, this plugin has been deprecated. You can still use this with Craft 2 but you are encouraged to use (and develop) a Craft 3 version. At this moment, I have no plans to do so.
Usage
Importing data is a two step process:
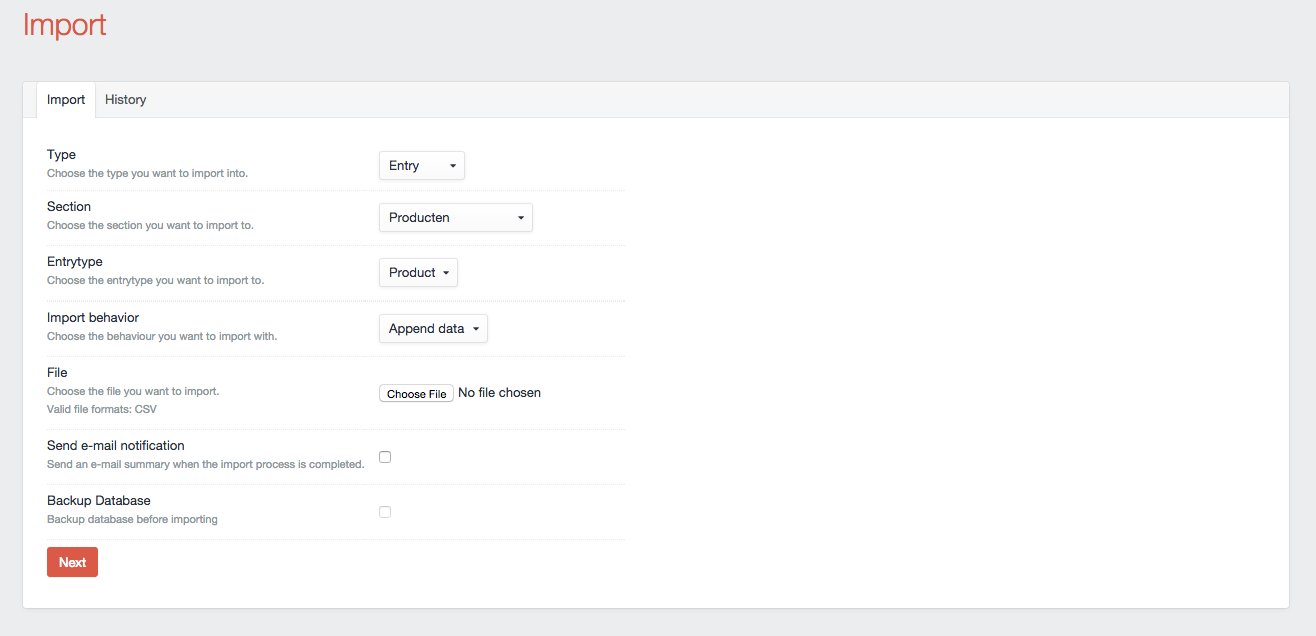
Step 1. Select import options
- Choose the type of element to import (Category, Entry, or User)
- Select the corresponding category group, section, entry type, or user group
- Select the Import Behavior:
- Append Data — Will add new categories, entries, or users.
- Replace Data — Will update data for existing matched categories, entries, or users.
- Delete Data — Will delete data for existing matched categories, entries, or users.
Step 2. Map CSV data
- Map the destination fields for the CSV data.
- Select which fields will be used as criteria to match existing records to replace (update) or delete data.
And import!
Features
- Import Entries, Users and Categories
- Map CSV columns onto Fields
- Append, replace or delete data
- When replacing or deleting, you can build your own criteria for finding
- Has a hook "registerImportOperation" to parse special field type inputs if you want.
- Has a hook "registerImportOptionPaths" to allow special field types to have a custom option (or options) in the mapping select menu.
- Has a hook "modifyImportRow" to allow special field types to customize data just before it gets imported.
- Has events "onImportFinish" and "onBeforeImportDelete"
- These will notify you when the import finishes or wants to delete an element
- Uses the Task service to import while you work on.
- Automatically detects CSV delimiters
- Will connect Entries (also Structures), Categories, Users and Assets by searching for them
- Will send a summary email when the task if finished
- View your import history
- Ability to revert imports
###Roadmap###
- Import more ElementTypes (Tags, Globals, Assets?) (0.8)
- Support JSON and XML (0.9)
Important:
The plugin's folder should be named "import"
Frequently Asked Questions
- How do I indicate an element field type in the CSV file?
- Import utilizes "search", so it can be anything that makes it unique
- How would I indicate a multiplicity of element field types in the CSV file?
- Just separate them by comma
- How should I write my CSVs so parent & child entries/categories work properly?
- Write it like Ancestor/Child/Entry and connect as "Ancestor". Do note that "Entries in this section have their own URLs" should be checked.
- Do parent entries already need to exist before I import a CSV? Or can they be created form the came CSV import as their child entries?
- The entry should exist, but if it comes in the row before then it will exist and it will pass.
- Is there an "Export" feature so I can get to data that is more complete in the DB than in my CSV file?
- No, but there is the "Export" plugin that can be found here: https://github.com/boboldehampsink/export
Screenshots
Hooks
modifyImportRow
Manipulate the data as the import is running. You'll be able to tweak your data just before it goes into the database.
This code example is a good starting point:
/**
 * Modify data just before importing
 *
 * @param BaseElementModel $element  The current element receiving import data.
 * @param array            $map      Mapping of data between CSV -> Craft fields.
 * @param array            $data     Raw data provided for this row.
 */
public function modifyImportRow($element, $map, $data)
{
    // Map data to fields
    $fields = array_combine($map, $data);

    // Initialize content array
    $content = array();

    // Arrange your content in a way that makes sense for your plugin
    foreach ($fields as $handle => $value) {
        $content[$handle] = $value;
    }

    // Set modified content
    $element->setContentFromPost($content);
}
The foreach loop is probably where you'll do the most customizing. However, feel free to edit any (or all) of this method to achieve your desired results.
registerImportOptionPaths
Prep the field mapping before the import is run. This allows you to customize the <select> menu option(s) for your field.
When you are mapping your CSV columns to Craft fields, Import let's you choose which field you want to assign your data to. There is a <select> menu with a list of Craft fields, and you select the destination for each column.
The purpose of this hook is to give you the opportunity to replace the standard <option> tag with something custom. In essence, you are providing a template which contains a custom <option> (or multiple options) to handle the data mapping in a way that is more preferable for your field type.
Put this in your main MyPlugin.php file, and edit accordingly:
/**
 * For custom field types, replace default <option> with custom HTML
 *
 * @return array  Mapping between custom field type -> custom <option> template
 */
public function registerImportOptionPaths()
{
    return array(
        'MyPlugin_MyFieldType' => 'myplugin/customImportOption.html',
    );
}
You are being given the opportunity to say "for fields of this type, use my custom template in place of the default <option> tag". Make sure your customImportOption.html template outputs one or more <option> tags... They will be injected into the field select dropdown menu.
In summary:
- Create a short template to replace the default
<option> - Map that template to your field type with this hook
If you want to dig in the code a little more and see how it works in even greater detail, check out this chunk of code here...


