A user system leveraging rest-hapi to bootstrap your app.
appy-backend is the server portion of the appy project. It provides a boilerplate user system that leverages the powerful rest-hapi API generator. Inspired by the frame user system, the goal of appy-backend is to provide an easy to use user API that is also capable of supporting a wide range of applications. appy-backend is a great resource for starting almost any app. By leveraging rest-hapi, adding new endpoints is as simple as defining a new model, and model associations are a snap. Bootstrapping your app has never been easier!
Features
- Registration and account activation flows
- Login system with forgot password and reset password
- Social login
- Abusive login attempt detection
- User permissions based on roles and groups
- Three optional authentication strategies
- Websocket chat via @hapi/nes
- File upload api
- Endpoint validation and query support
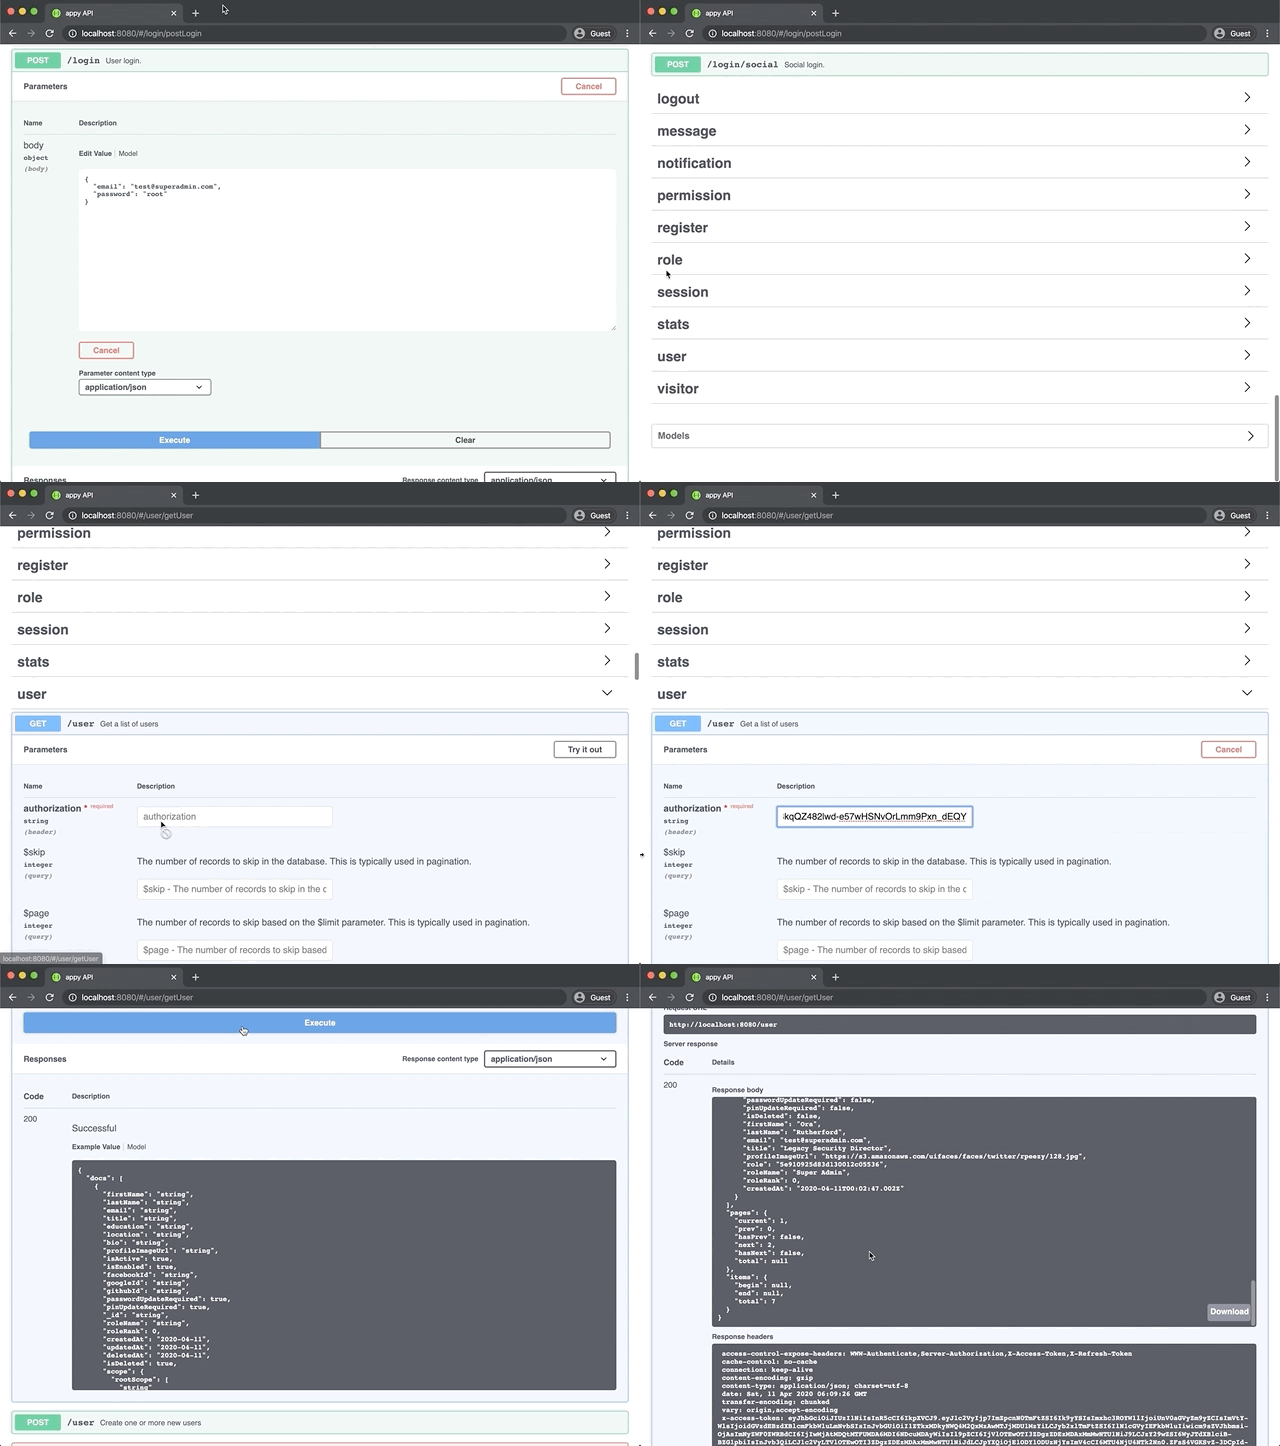
- Swagger docs for easy endpoint access
Technologies
appy-backend implements a hapi framework server. appy-backend's RESTful API endpoints are generated through rest-hapi, which means models are based off of mongoose and data is stored in MongoDB.
Demos
View the swagger docs for the live demo:
Starting appy-backend
Logging in
GET /users
Filter Query and Populate Relationship
Readme contents
- Requirements
- Getting Started
- Installation
- Configuration
- First time setup
- Running appy
- Wiki
- Swagger documentation
- Authentication
- Authorization
- License
- Questions
- Contributing
- Thanks!
Requirements
Just Docker
OR
You need Node.js installed (>=12.14.1) and you'll need MongoDB installed and running.
Getting Started
Download from GitHub:
$ git clone https://github.com/JKHeadley/appy-backend.git
$ cd appy-backend
Installation
Using Docker
None required.
Without Docker
$ npm installConfiguration
appy configuration follows frame's configuration flow:
Simply edit
config/index.js. The configuration uses confidence which makes it easy to manage configuration settings across environments. Don't store secrets in this file or commit them to your repository.
Instead, access secrets via environment variables. We use dotenv to help make setting local environment variables easy (not to be used in production).
Using Docker
Simply copy .env-docker-sample to .env-docker and edit as needed. Don't commit .env-docker to your repository.
Without Docker
Simply copy .env-sample to .env and edit as needed. Don't commit .env to your repository.
First time setup
WARNING: This will clear all data in the MongoDB database defined in restHapiConfig.mongo.URI (default mongodb://localhost/appy).
If you would like to seed your database with some data, run:
Using Docker
$ sh seed_data.sh
Without Docker
$ npm run seed
NOTE: The password for all seed users is root.
Running appy-backend
To quickly run the app locally, simply run:
Using Docker
$ sh run_server.sh
Without Docker
$ npm start
Once the app is running point your browser to http://localhost:8080/ to view the Swagger docs.
Wiki
For detailed explanations on many of the topics covered in this readme, including authentication, authorization, and logging in and testing endpoints, please refer to the wiki pages.
Swagger documentation
Swagger documentation is automatically generated for all endpoints and can be viewed by pointing a browser at the server URL. By default this will be http://localhost:8080/. The swagger docs provide quick access to testing your endpoints along with model schema descriptions and query options.
Authentication
There are three optional authentication strategies in appy and each make use of javascript web tokens (JWT) and the hapi-auth-jwt2 scheme. The three strategies are:
- Standard token
- Session
- Session with refresh token
The strategy used is determined by the restHapiConfig.authStrategy config property.
For a more in-depth description of these strategies, please view the wiki.
Authorization
Authorization in appy is enforced via the hapi scope endpoint property. Endpoints generated through rest-hapi come prepopulated with scope values. See the rest-hapi docs for more info.
User scope values are populated based on appy's permission system. User's gain permissions based on three associations:
- User defined permissions
- Group defined permissions
- Role defined permissions
Users must belong to at least one role and can belong to multiple groups. Each permission association carries with it a state property that can be set to Included, Excluded, or Forbidden. This property allows permissions to override each other based on priority. User permissions have the highest priority, followed by Group permissions and lastly Role permissions:
User->Group->Role
This allows easy and specific configuration of user endpoint access. In general, a user will gain the majority of it's permissions through it's role. Those permissions will be further defined by any groups the user belongs to. Finally a user might have a few specific permissions assigned directly to them. A user's scope final scope is a combination of the user's role, groups, and effective permissions. See below for an example:
User: '[email protected]'
Role: 'Admin'
Role Permissions:
[
  { name:'readUser', state:'Included' },
  { name:'updateUser', state:'Included' },
  { name:'addUserPermissions', state:'Included' },
  { name:'removeUserPermissions', state:'Included' }
]
User's Groups: ['Managers']
Group Permissions:
[
  { name:'updateUser', state:'Excluded' },
]
User Permissions:
[
  { name:'removeUserPermissions', state:'Excluded' },
]
Final User Scope:
['Admin','Managers','readUser','addUserPermissions']For a more in-depth description of authorization within appy, please view the wiki
License
MIT
Questions?
If you have any questions/issues/feature requests, please feel free to open an issue. We'd love to hear from you!
Contributing
Please reference the contributing doc: https://github.com/JKHeadley/appy-backend/blob/master/CONTRIBUTING.md
Thanks!
We hope you enjoy appy-backend!


